How to build a storage server ďż˝ A step-by-step guide - Part 1
We’re frequently asked how to assemble server systems, and if they’re any different to a normal PC. In many ways they are identical, but the quality of the chassis and components are very different. The chassis for example are industrial grade – the steel is thicker and the individual fans or other internal components are of a much higher build quality. That’s the same for the likes of server RAM, motherboards etc.
We thought we would put together a quick step-by-step guide showing a recent server build for a customer. We build hundreds of servers a month, but spent a few extra minutes today to photograph a server build in progress.
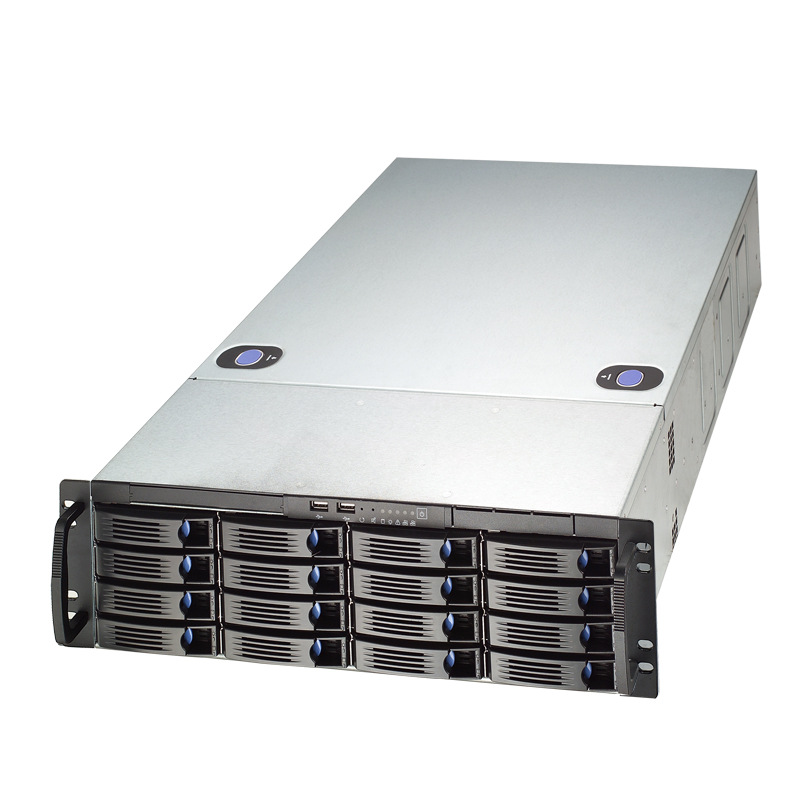
This particular server is a storage solution for a local college. It is housed within a Chenbro RM31316E2 chassis. The chassis has 16x SATA III (6Gbps) drive slots, compatible with both 3.5” and 2.5” drives, in both hard drive and SSD form factors. This customer opted for 16x Western Digital 3TB RED drives. These are very high quality drives at an excellent price, designed for 24/7 NAS/Storage uses.
These drives are all connected to the internal LSI 9240-4i SAS/SATA RAID controller. The backplane in the Chenbro chassis has a built-in Expander, so you can go with a much more cost effective 4 port card, rather than a more expensive 16 port model.
The motherboard used was a Supermicro X9SCL-F motherboard – a firm favourite with all of us here. It’s a fantastic small motherboard, but packing plenty of expansion. This customer opted for an Intel Xeon E3-1230V3, a 3.1GHz Quad Core. The motherboard will also take a more cost effective i3 CPU too, so is ideal for systems that don’t need quite the processing power of a Xeon.
On-board the motherboard are 4x Supermicro/Hynix 4GB ECC memory modules. The ECC (Error Checking Correcting) RAM is essential for a reliable server.
In addition to all of this, the customer opted for 2x Western Digital Black 320GB 2.5” drives, installed on a special bracket for this chassis above the CPU area. These two drives will be setup in RAID 1 mirrored off the motherboard’s hardware RAID (another reason we love this board, as it supports RAID 0, 1, 5 and 10). This would be for the customers operating system, leaving all data drives for storage only.
The customer also went for a legacy SCSI U320 controller to support their external disk library, and although not pictured they also went for a Supermicro AOC 2-port 10Gbps SFP+ NIC card as they will be connecting this server directly to their 10G core network switch for maximum throughput.
All of this is powered by a Zippy 650W Triple Redundant (2+1) PSU. If one PSU module fails then the other remaining 2 keep the system running with zero disruption. All modules are hot-swap so can be removed while the system is powered on, and again zero disruption to the system.
With the specifications over with – let’s get cracking with the step-by-step;
Step 1 - Prepare Hardware
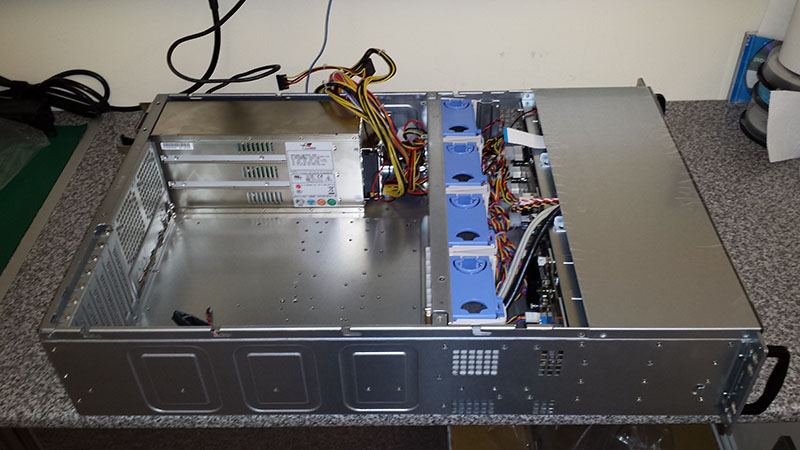
Ensure all components are present. Remove the top cover from the chassis and inspect for any damage. Remove any unwanted parts such as additional cables, screw kits etc.
Step 2 - Install Motherboard
Install the motherboard into the chassis. Ensure the IO plate is fitted first, any knock-outs removed (if applicable) for network ports etc, and also ensure that the motherboard stand-offs are securely fitted to the chassis in the right positions. Do a test fit of the motherboard first and ensure all stand-offs are fitted and that none are in incorrect locations.
Cable ties are your friend – use as many cable ties as you want to neatly arrange cables. Also use sticky cable tie clamps to secure cables to metal areas of your chassis. This leaves a professional finish and also helps with airflow. Loose cables may move about, get in the way of fans/components, or prevent air from flowing properly.
** Check back Tuesday 23rd for Part 2! **

Facebook
YouTube
LinkedIn
Instagram
Call us today on 01283 576162 to talk directly to one of our server specialists
Who we are
Europe's specialist value added distributor of server chassis, server components and server systems.
Server Case is a specialist server chassis distributor based here in the United Kingdom, with an extensive range of 19” rackmount cases built to suit a variety of environments; including remote industrial servers and everything in between. Furthermore, our distribution partnerships have allowed us to develop and deliver Server Barebones and fully configured systems to the vast IT Channel and Enterprise customers.
Latest Blog
MSI Rackmount Servers: A New Contender in Enterprise Solutions
Posted on: 2nd Aug 2024
The landscape of enterprise computing continues to evolve, with companies like MSI, ASUS, and Supermicro offering robust server solutions tailored to various needs. Among the latest contenders in this space are MSI's new rackmount servers, part of their MSI Enterprise Platform Solutions. These servers are designed to meet the demanding requirements of modern enterprises, providing an appealing alt... [...] Read more
Latest Video
View more of our reviews, unboxing and installation videos on YouTube.
Business Links
Site Information